A friend (Lee Jiing … another photography addict) posted a photo of this plastic camera that comes with the Jr. Scientist magazine on Facebook and being curious (as usual) … I dropped him a message and he told me he found it at Toys R Us while shopping for toys for his kiddos. Toys R Us! Looking very much like another one of those Gakken DIY plastic cameras … I decided to pick one up to take a look … at least get it assembled for fun … and see if I’ll be able to shoot any decent photo with it later.
It is a camera with a lens and a pinhole … 2 in 1!

Lee Jiing warned me about the instructions enclosed (in the mag) saying that it is pretty darn confusing. OMG! Now what can be more confusing than trying to figure out the Gakkenflex/Stereo pinhole ones without understanding a single Japanese character in the past?
After Fitzand went to bed, I gulped down an expresso and started exploring this camera. Lee Jiing told me it takes just a couple of minutes to get it assembled … giving me some stress. I can’t be that stupid that it will take me an hour … right?

The box says ‘Gakken’! So this is probably from them too … but maybe repackaged for the Jr. Scientist mag? Anyone seen this in some earlier Gakken series before?

Behind the box … it claims to have a zoom function too (with the pinhole)! AHahaha! Awesome! No mention of autofocus though. 😛

The exciting part … skipping the other articles/tutorials and head straight to the assembly section …

Okay .. here are some snaps of the other pages …
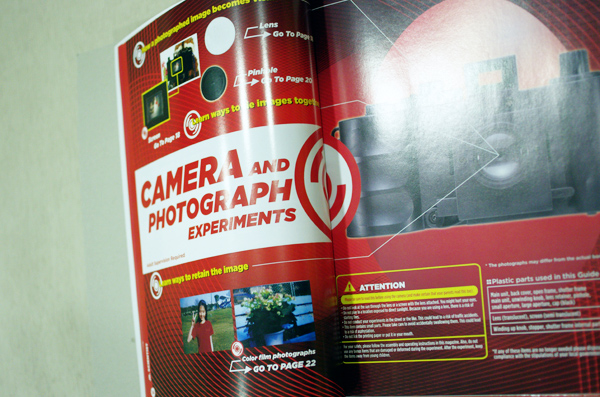
Some pretty cool tips and tricks …


Lee Jiing also told me that no screwdrivers (or screws!) are required to assemble this camera. No springs too! That’s good news! The Gakkenflex got me a headache when I had to figure out the screws and springs … and I don’t want anymore headache on a Monday.

Look at the parts included … so few! Cool! That’s gonna be simple! It took me maybe 3 or 4 minutes to get it assembled. Easy peasy!
Notice the 3 round discs in the photo (one of them somehow is ‘hiding’ on the back cover)? Those are your aperture discs. You swap them like you would on a Lensbaby lens. Just drop the aperture disc onto the ‘barrel’ and then drop in the lens. For pinhole mode … just drop in the pinhole disc.

Do not look directly at the sun or else you will get fuzzy eyeballs like me!

Now … does ‘Rotate this sign once’ mean a full turn will advance once frame on the film?
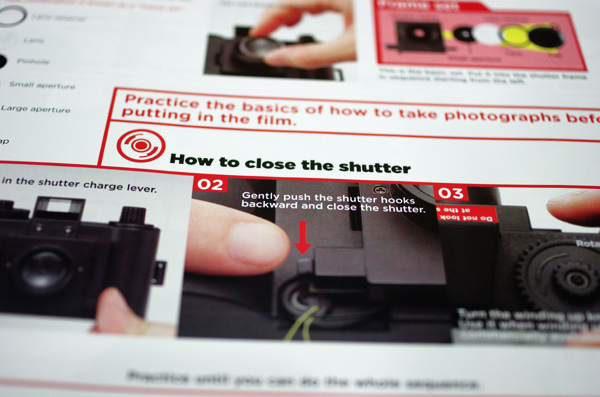
It is either my English sucks or the instructions are translated not too well eh? 😀 I’m not gonna decipher the details on how to use, focus etc now. Save that for tomorrow or another day when I’m not this tired.

Now that’s something I’ve to remember (pic above). Remove the ‘stopper’ before rewinding … or I might just break some stuffs if I force the rewind.
‘The film will make a noise as it is being unwound’ … whoa … sounds freaky! 😀
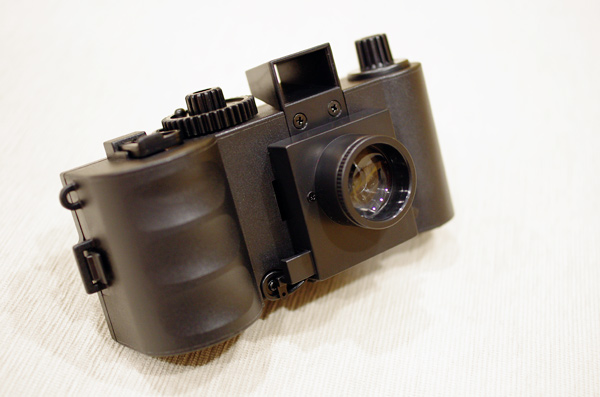
The fully assembled camera!

The front assembly in the ‘no zoom’ mode.
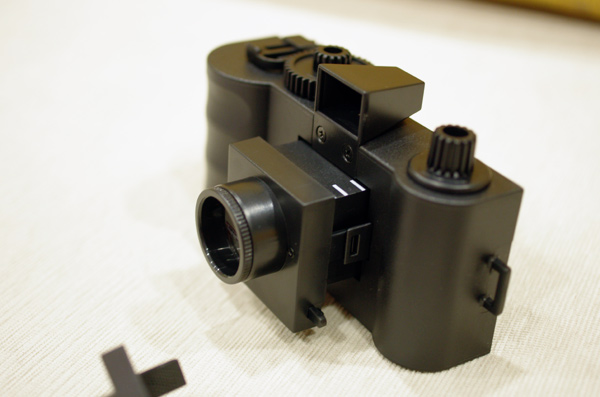
The front assembly in the zoom mode. Just pull out the front to ‘zoom’! Does it work only in pinhole mode (as what it says at the back of the box)? I don’t know. I’ll update after I finish reading the instructions.

To cock the shutter … or as the instruction says … to ‘charge the shutter’. Press (inwards) the little lever on the right.

To release the shutter … press the other lever on the left. To do this … you must press it fast and firm. That’s what I realize. If you do it slowly … you might end up having the shutter half opened … like what you see in the image below …

Overexposure alert!
Next comes something very interesting. When Lee Jiing was telling me about this camera and the confusing instructions … he told me about this ‘Angle lever’. He says that the instruction doesn’t mention its usage and told me to see if I could figure out what it is for.


I took a look … some hair fell … then I realized maybe … just maybe … it is what I think it is! To raise the angle of the camera when placed on a flat surface! See the below photos and tell me if it makes sense. Hahaha!

Flat on the surface (top) and raised angle (below)

Before I conclude this entry and go to bed … here are a couple more photos of the cam …
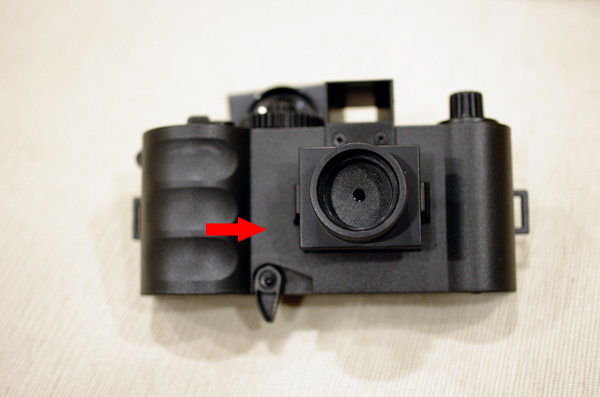
The cam comes with 2 front assembly. One without the ‘shutter button’ (photo above). I guess this one is more for the pinholes whereby you use the lens cap to open and close the ‘shutter’. Oh … the lens cap is one hell of a loose one. Secure it with a thread to avoid losing it.

On the back of the camera … it says ‘Gakken’ but there is also a sticker that says ‘Toys R Us’ …


Hmm … what did I leave out? Oh … at the bottom of the camera there is tripod mount (metal!) and the viewfinder above … is just a hollow one. 😀
Maybe I should load a roll of cheap expired negative and give it a test run this weekend.
If you are wondering how much this camera costs … it goes or S$29.50 (or is it S$29.90) at Toys R Us in the science section. 😉
I think you got it right on the “angle” lever.. I could never work that out … :p lol
@leejiing : Really?! Do I get a prize?! 😀 Thanks for letting me know about this cam. Are you gonna ‘test drive’ yours this weekend? 🙂
That thing looks fun. My adventures putting together the Gakken were confusing and beer-fueled, to say the least. Maybe I’ll try this one out.
The most interesting of your recent find.
@Jenni : Beer-fueled? Now I need to know … did you assemble it after drinking or did you need a drink after the assembly? Hahaha! For me … it was the latter. This one is a piece of cake compared to the Gakkenflex. 😀
@Kahong : Getting one to play? 😀
zann gave me this mag some time back, remember he told me he got it few years ago… (its a gakken kid science series no.02, japan magazine)… so when I’m ready to play with mine i will probably take your english version to read up. LOL LOL
@norya : Now that’s unfair! Zann gave you this toy and he gave me some bloody spicy beer that night?! Hahaha! Sure I can pass you the English version of the instructions but I guess you don’t really need it to get it assembled. I can pass it to you at the same place we meet your darling last night. Hehehe! Beer and sausages!!!
Do you know anything about the pinhole aperture for this model? My shutter stuck badly and forcing it would cause bad shake, so I want to use it for pinhole only.
@Loewe : Sorry I have no idea about the aperture for the pinhole. I don’t remember it being mentioned in the instructions.
I used to be able to find good info from your blog articles.